
I don’t care what anyone says– I’ve always been a fan of wallpaper. I think when it’s done right, it can be really beautiful and bring a lot of life to a room in ways that paint and wall decor just can’t do. I personally love the look of wallpaper in small spaces. While it can look overwhelming and dated in large rooms, I think it’s perfect for accent walls, powder rooms, home offices and guest bedrooms if you pick the right design.
One downside to renting is the limits on modifications– changing wall colors or doing any type of construction is typically not allowed in any lease agreement. I’ve always loved the idea of doing a statement wall with either paint or wallpaper, but never seriously considered it because of the damage it could possibly do to the walls. Then I discovered temporary peel-and-stick wallpaper! I can’t remember where I heard about it first (probably on Pinterest) but I knew as soon as we moved in to our new place that it was something I wanted to do.

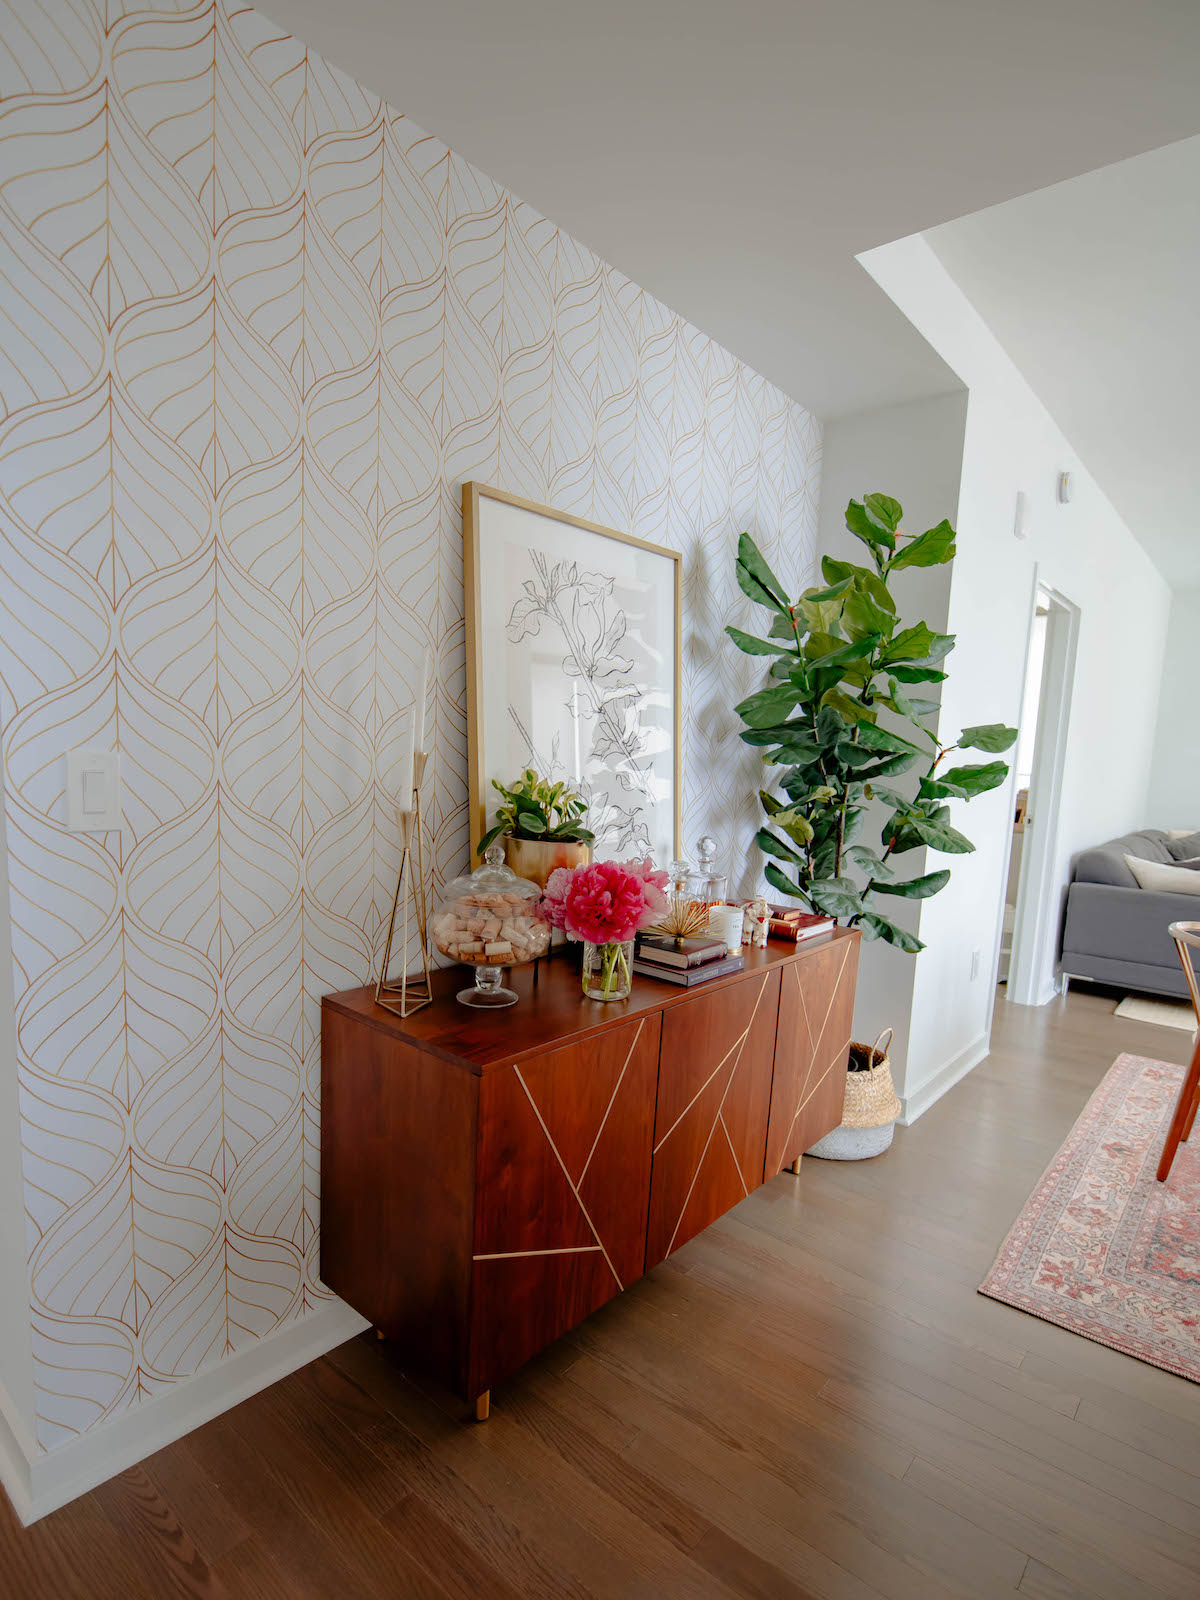
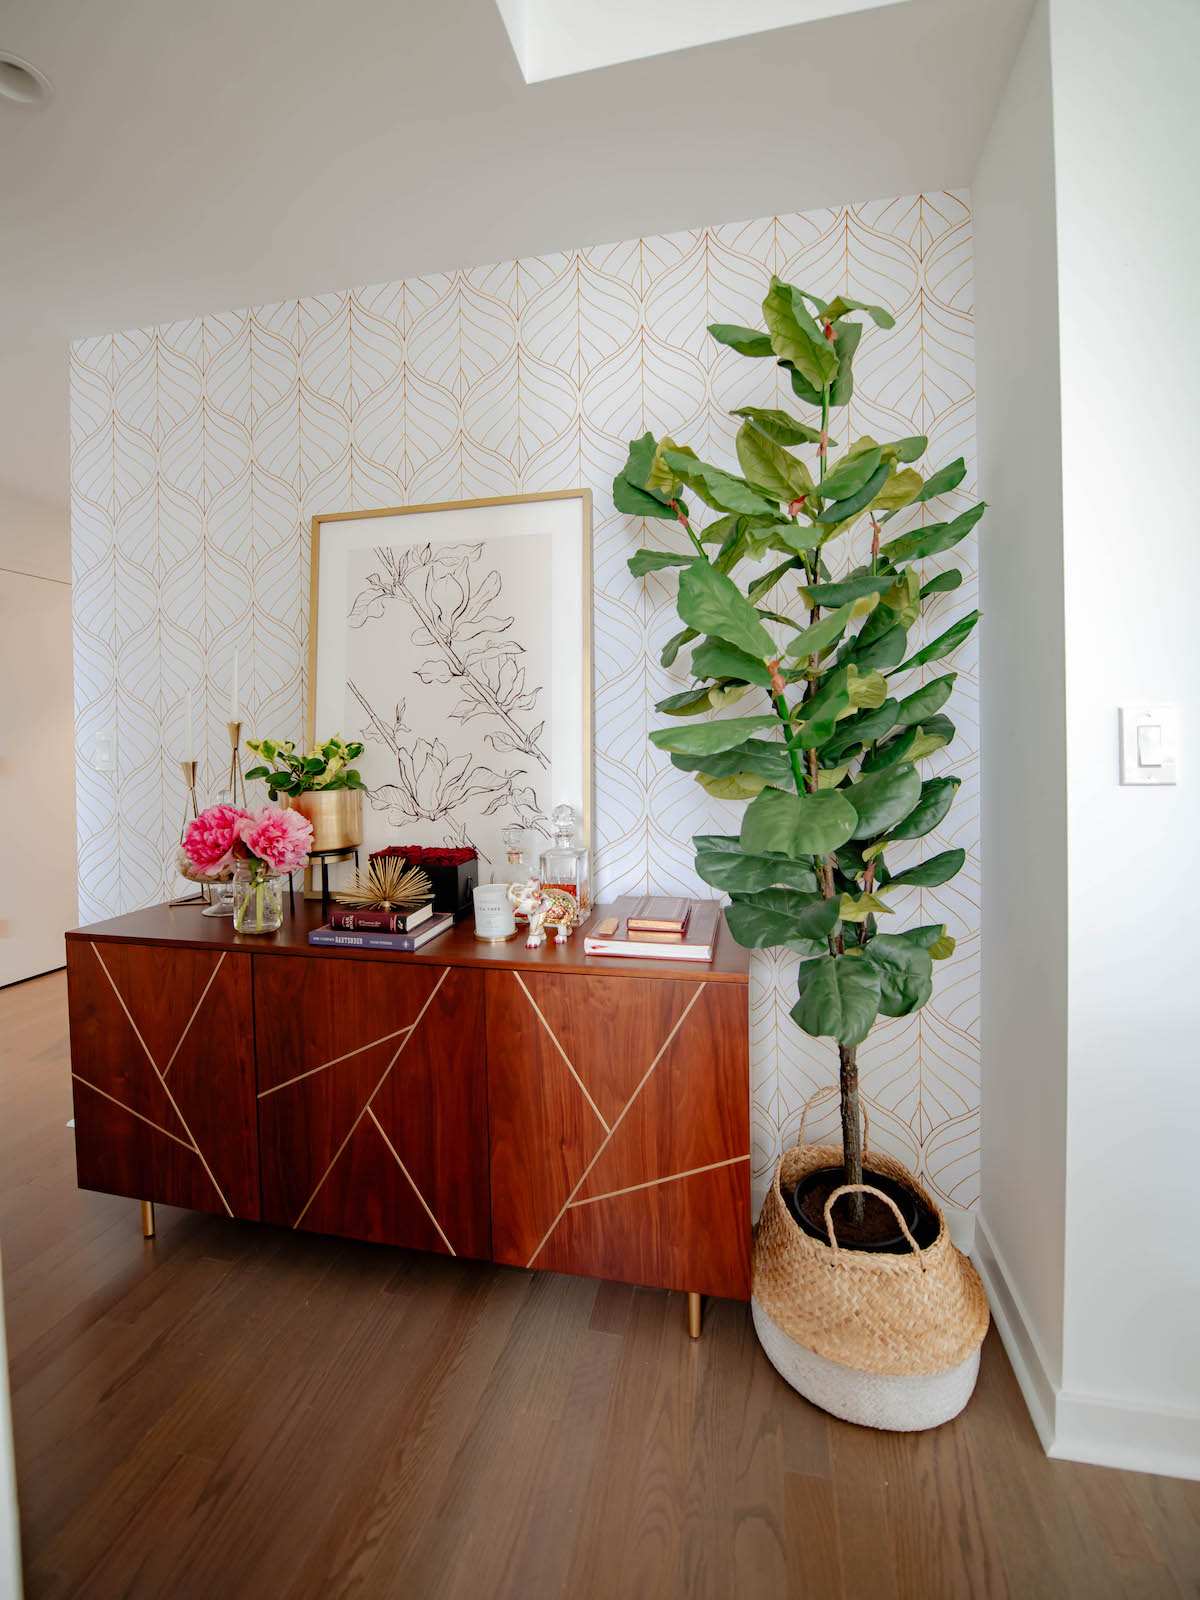
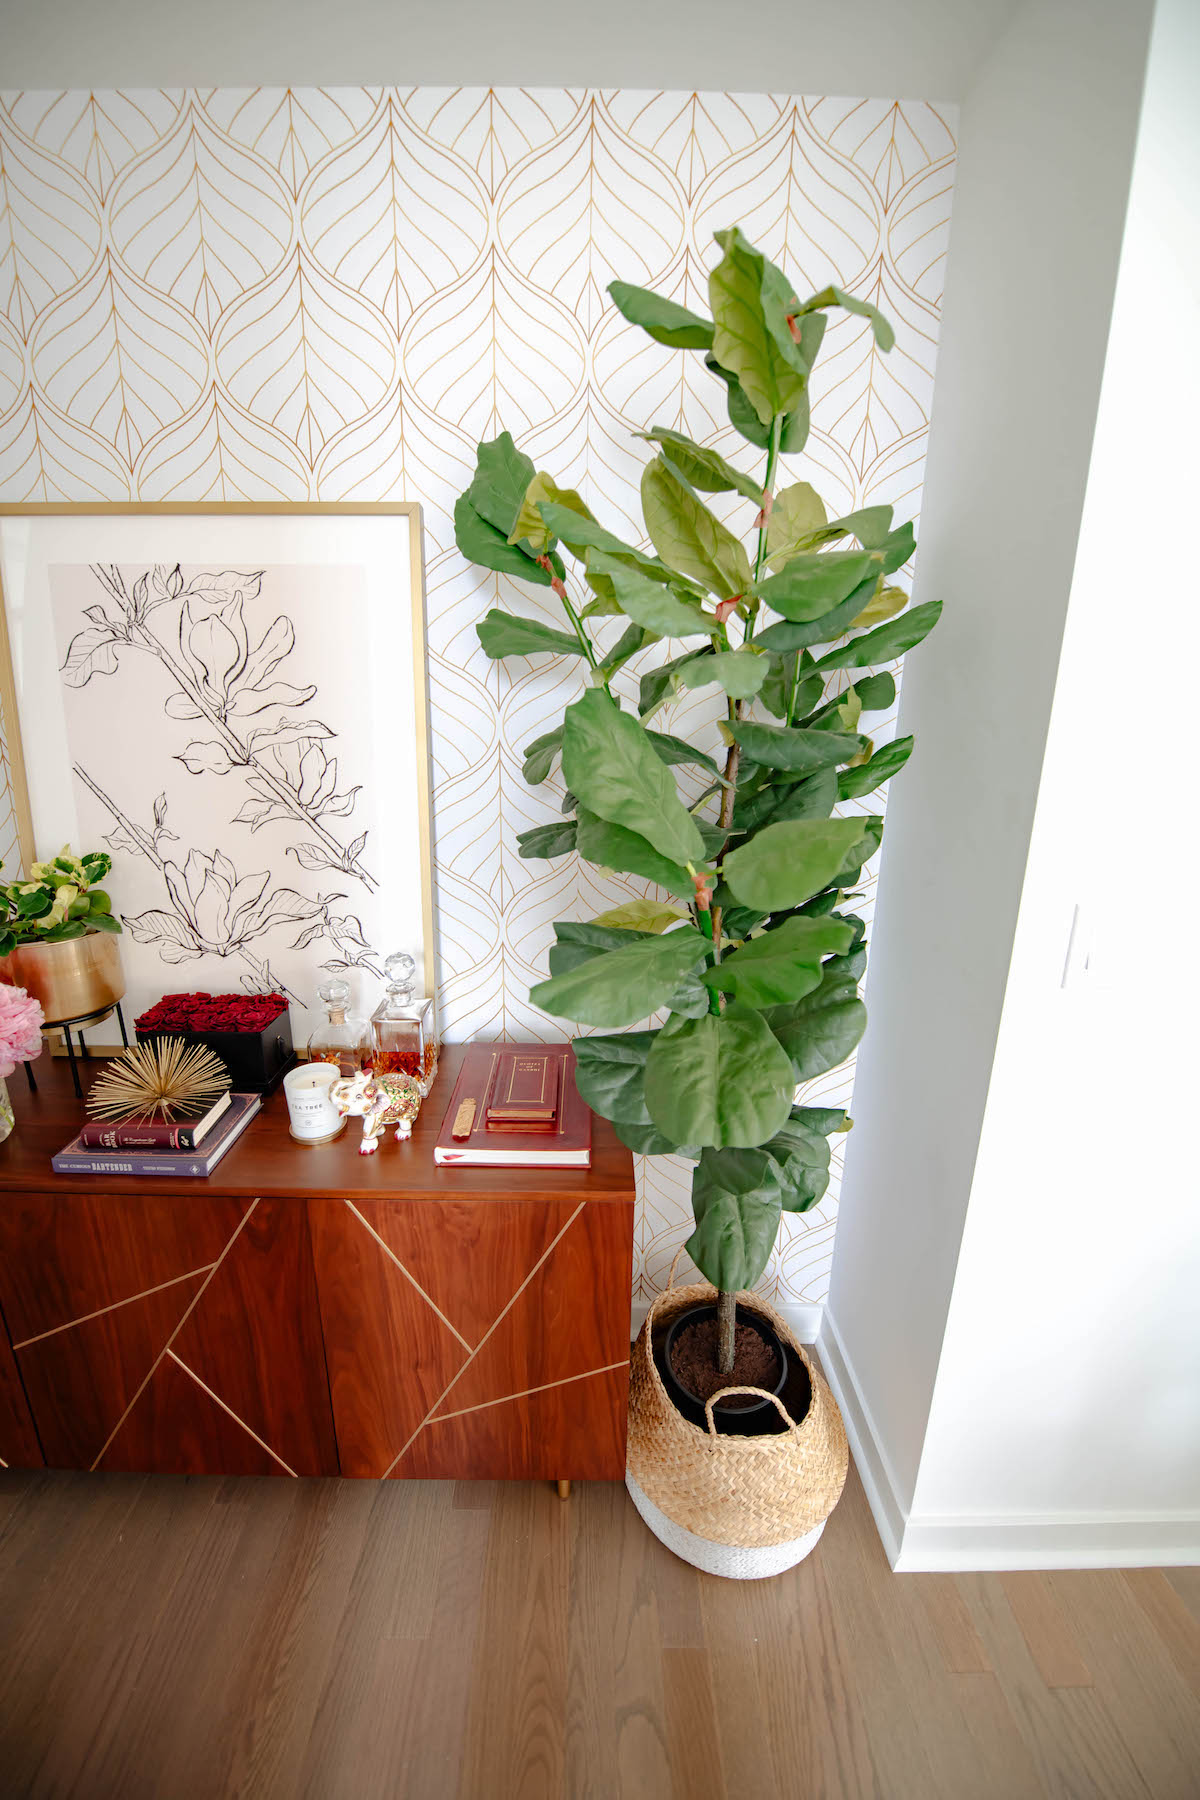
BEFORE & AFTER of our accent wall makeover!
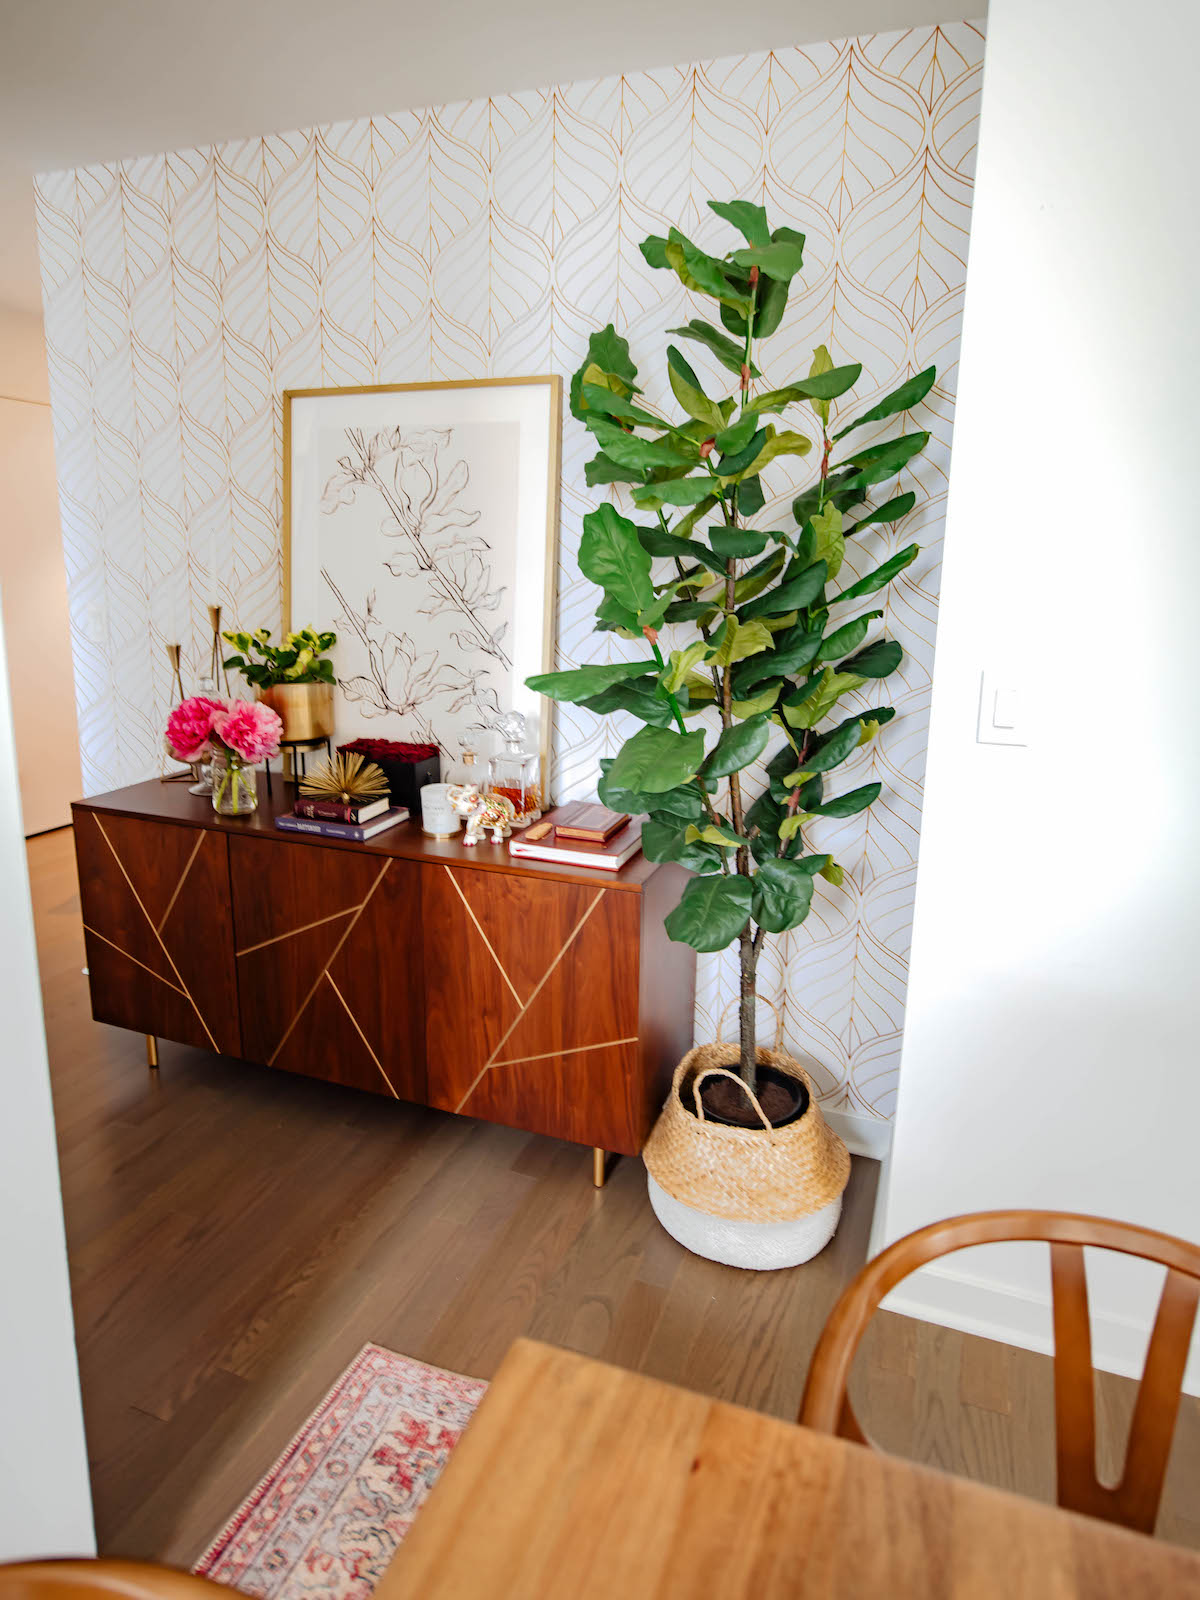
Luckily Nick loved the idea and we both agreed that the best spot to do it would be the wall behind our credenza. We thought it would be the perfect space because the wall isn’t too big and it’s set back in the hall that leads from our foyer to the living and dining room.
It took a while for us to find the right wallpaper design. There are SO many options out there and I probably spent a good 6+ hours combing Etsy for the perfect pattern. We wanted a design that would look chic and elevated, but not overpower the wall or clash with the rest of our decor. It was important that the pattern timeless to ensure we wouldn’t get sick of looking at it after a few months.
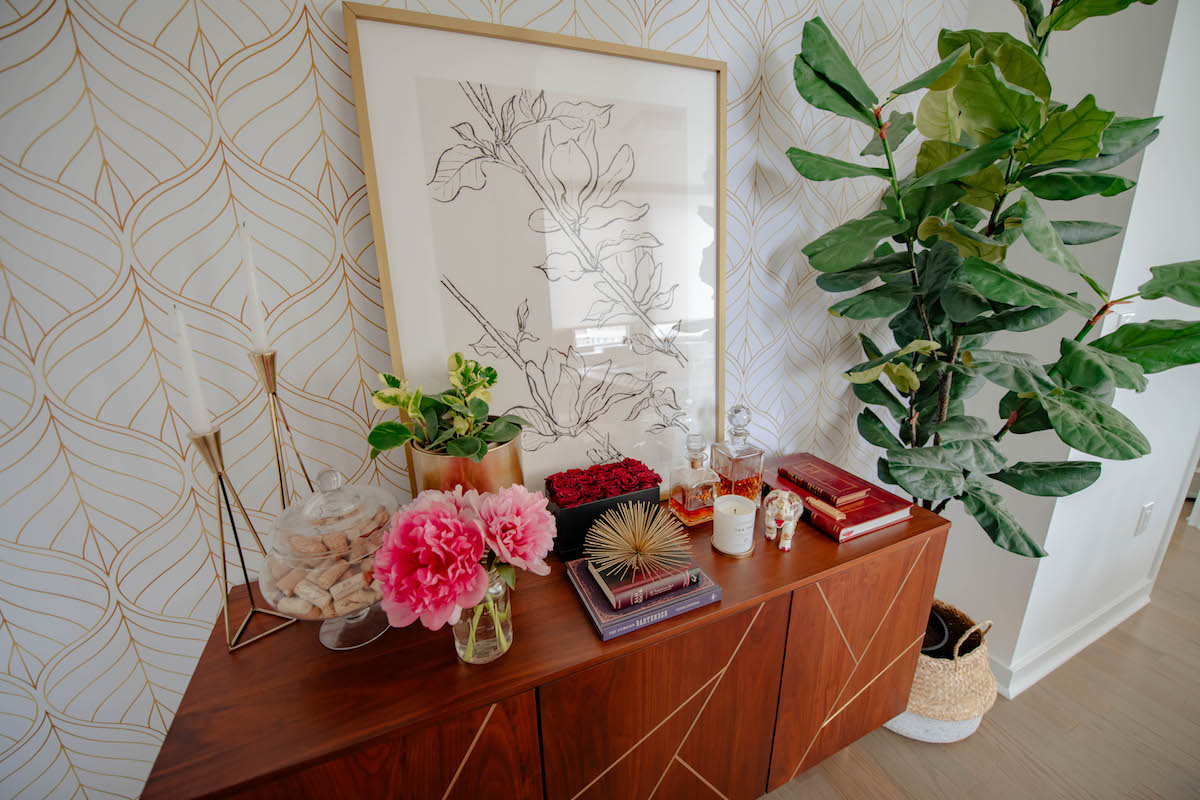
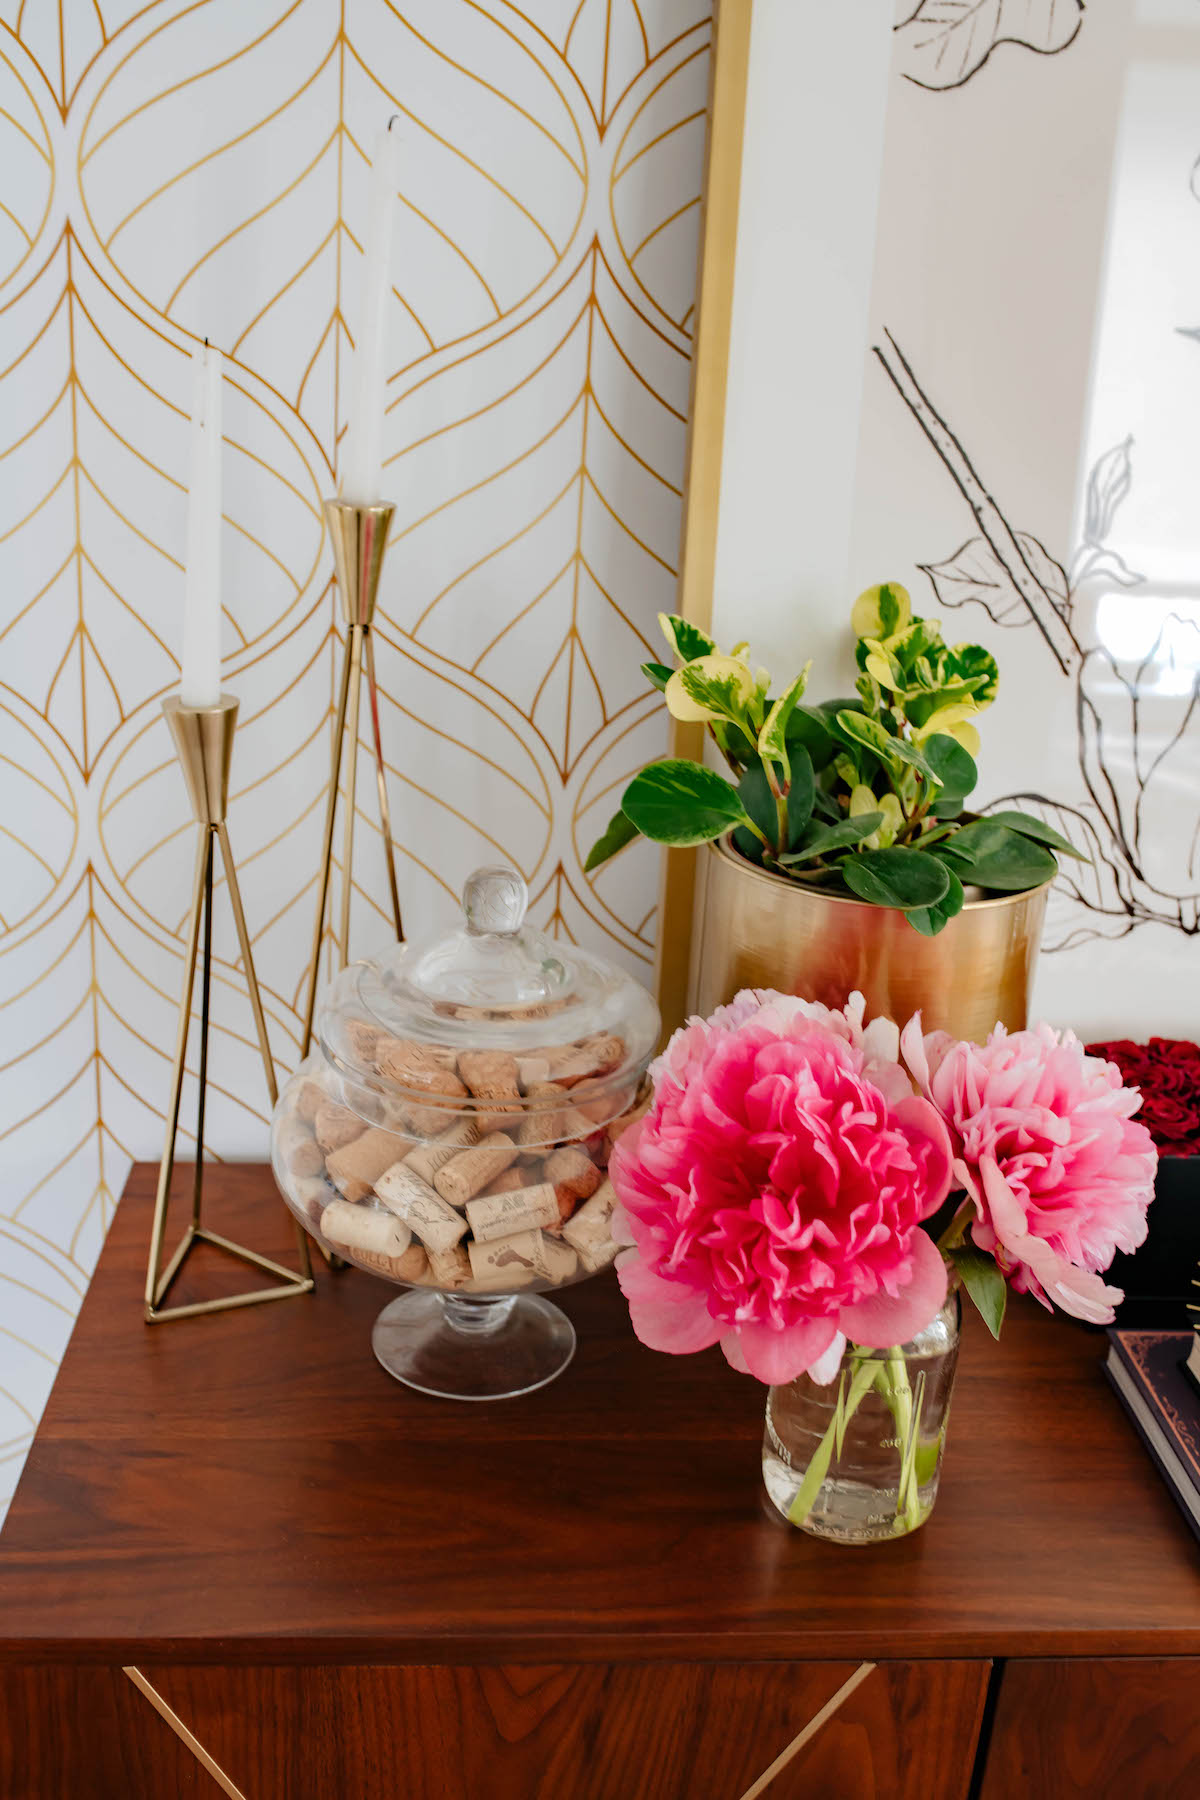
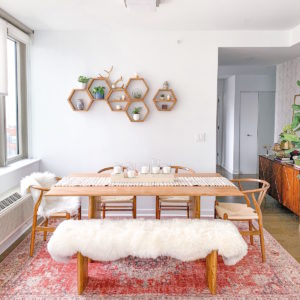
ITEMS PICTURED // Temporary Wallpaper | Credenza | Fiddle Leaf Fig Tree | Similar Basket Planter | Framed Art Print | Metal Planter | Tabletop Plant | Crystal Decanter | Gold Urchin | Gold Candlesticks | Apothecary Jar | Mason Jar Vase
I’ve always been a fan of botanical prints and since gold is the accent metal we’ve been using in our living room, we decided to go with a retro leaf pattern in gold. I love how it has a little bit of a boho vibe, but still feels very elegant. The design makes a statement without being too over the top.
We were both a little nervous going into putting up the wallpaper, but as soon as we had applied the first strip we knew we’d made the right choice. It looks even prettier than I’d anticipated and we’re both obsessed with the final result!
So how did we do it? With a lot of patience and teamwork. I won’t lie– it was a little tedious, but if you’re careful it’s really easy to do! It took us over 4 hours to apply the wallpaper ourselves. Here’s how we did it!
MORE TEMPORARY WALLPAPER OPTIONS…

How To Apply Temporary Wallpaper In A Rental Apartment
STEP 1
Wipe down walls with a damp cloth. Let walls dry (we waited about an hour)
STEP 2
Unroll wallpaper panels.
We made the mistake of assuming all 4 panels were identical and didn’t notice there were numbers on the back indicating what order these should be hung until we were about halfway done. Luckily it isn’t noticeable that our pattern is slightly off, but depending on the design of your paper you definitely want to make sure you check this before getting started.
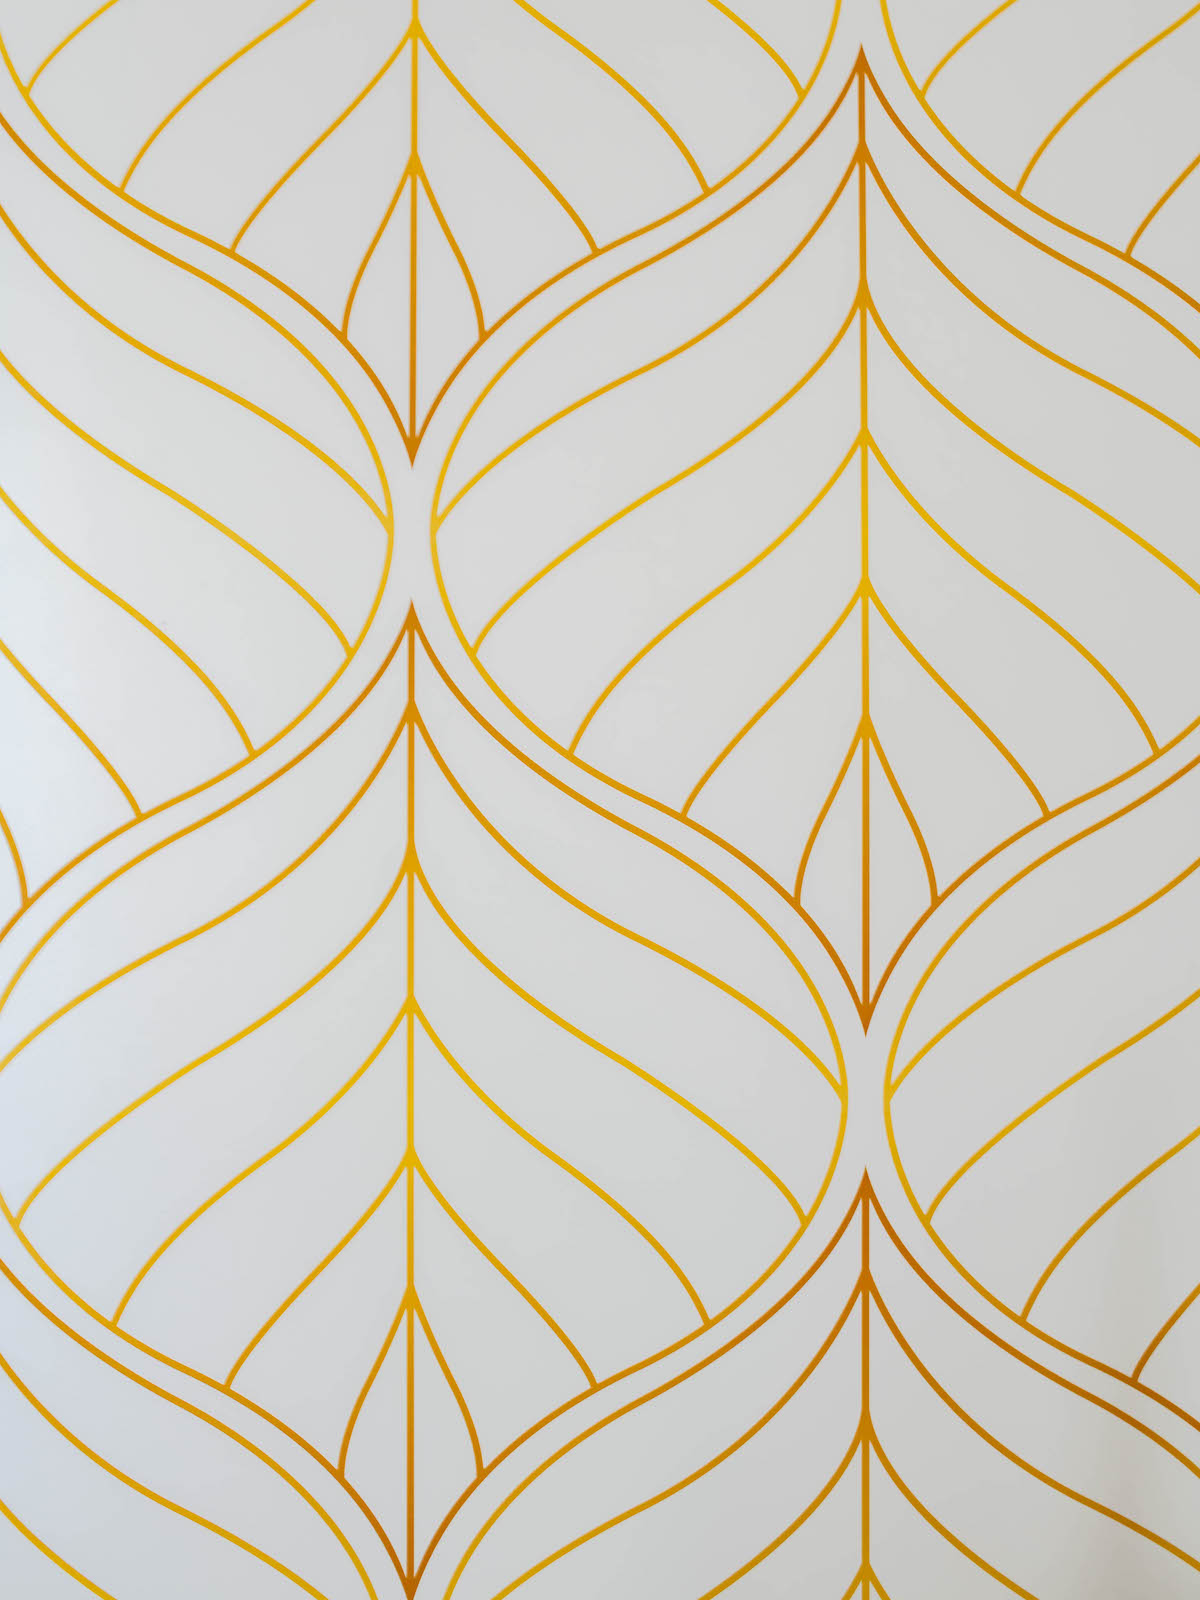
Nick & I both fell in love with this Retro Golden Leaves patterned temporary wallpaper
STEP 3
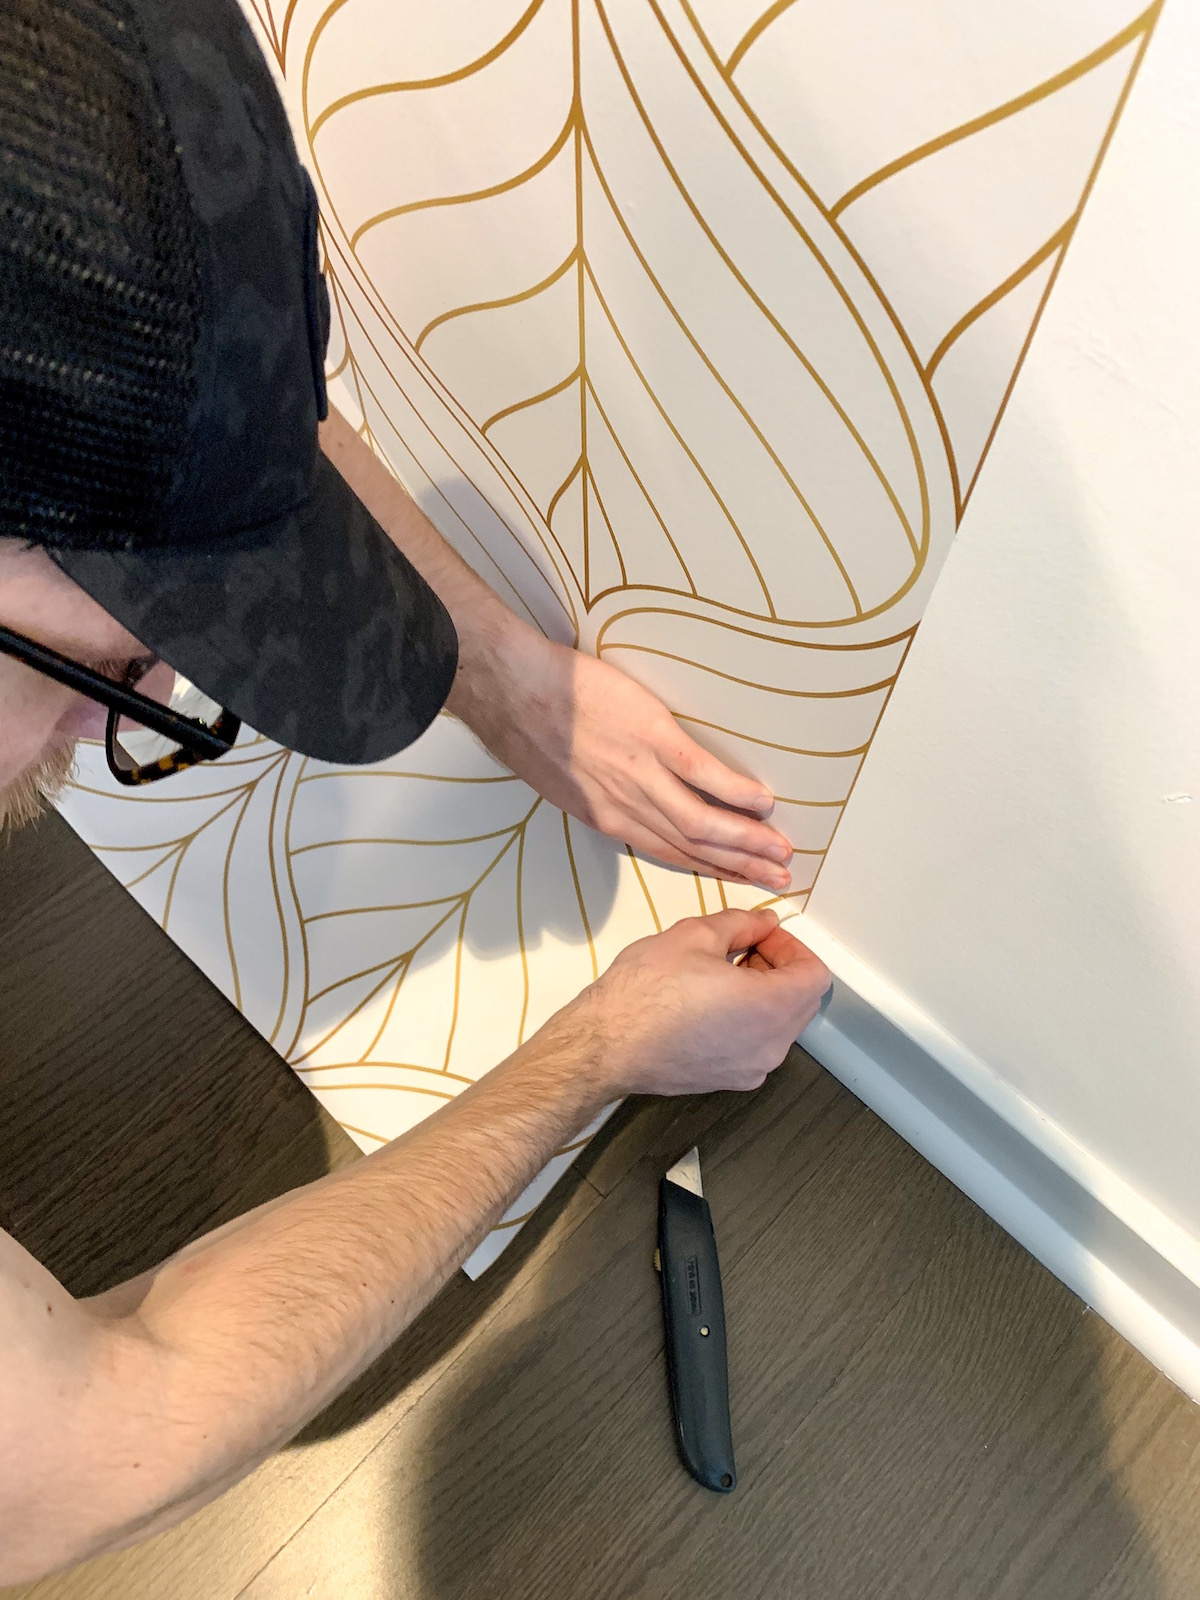
Line up your first panel and peel off about 10 inches of the backing, sticking paper to the wall.
We found this was much easier with two people, especially because the paper can get heavy depending on the height of your wall. Nick stood on a step stool to line up and stick the paper, holding one corner in each hand. Once the backing is removed you need to be SO CAREFUL the paper doesn’t get crumpled or stick to itself. Highly recommend having one person take the lead on the sticking/alignment and another person to hold on to the extra length keeping the paper steady.
STEP 4
Continue removing the backing and sticking paper to the wall, smoothing out creases and air bubbles as you go. We used a thin hardcover book to do this, but really any piece of smooth plastic or narrow hard object like a ruler would work. Just make sure whatever you use won’t damage or leave residue on your paper!
STEP 5
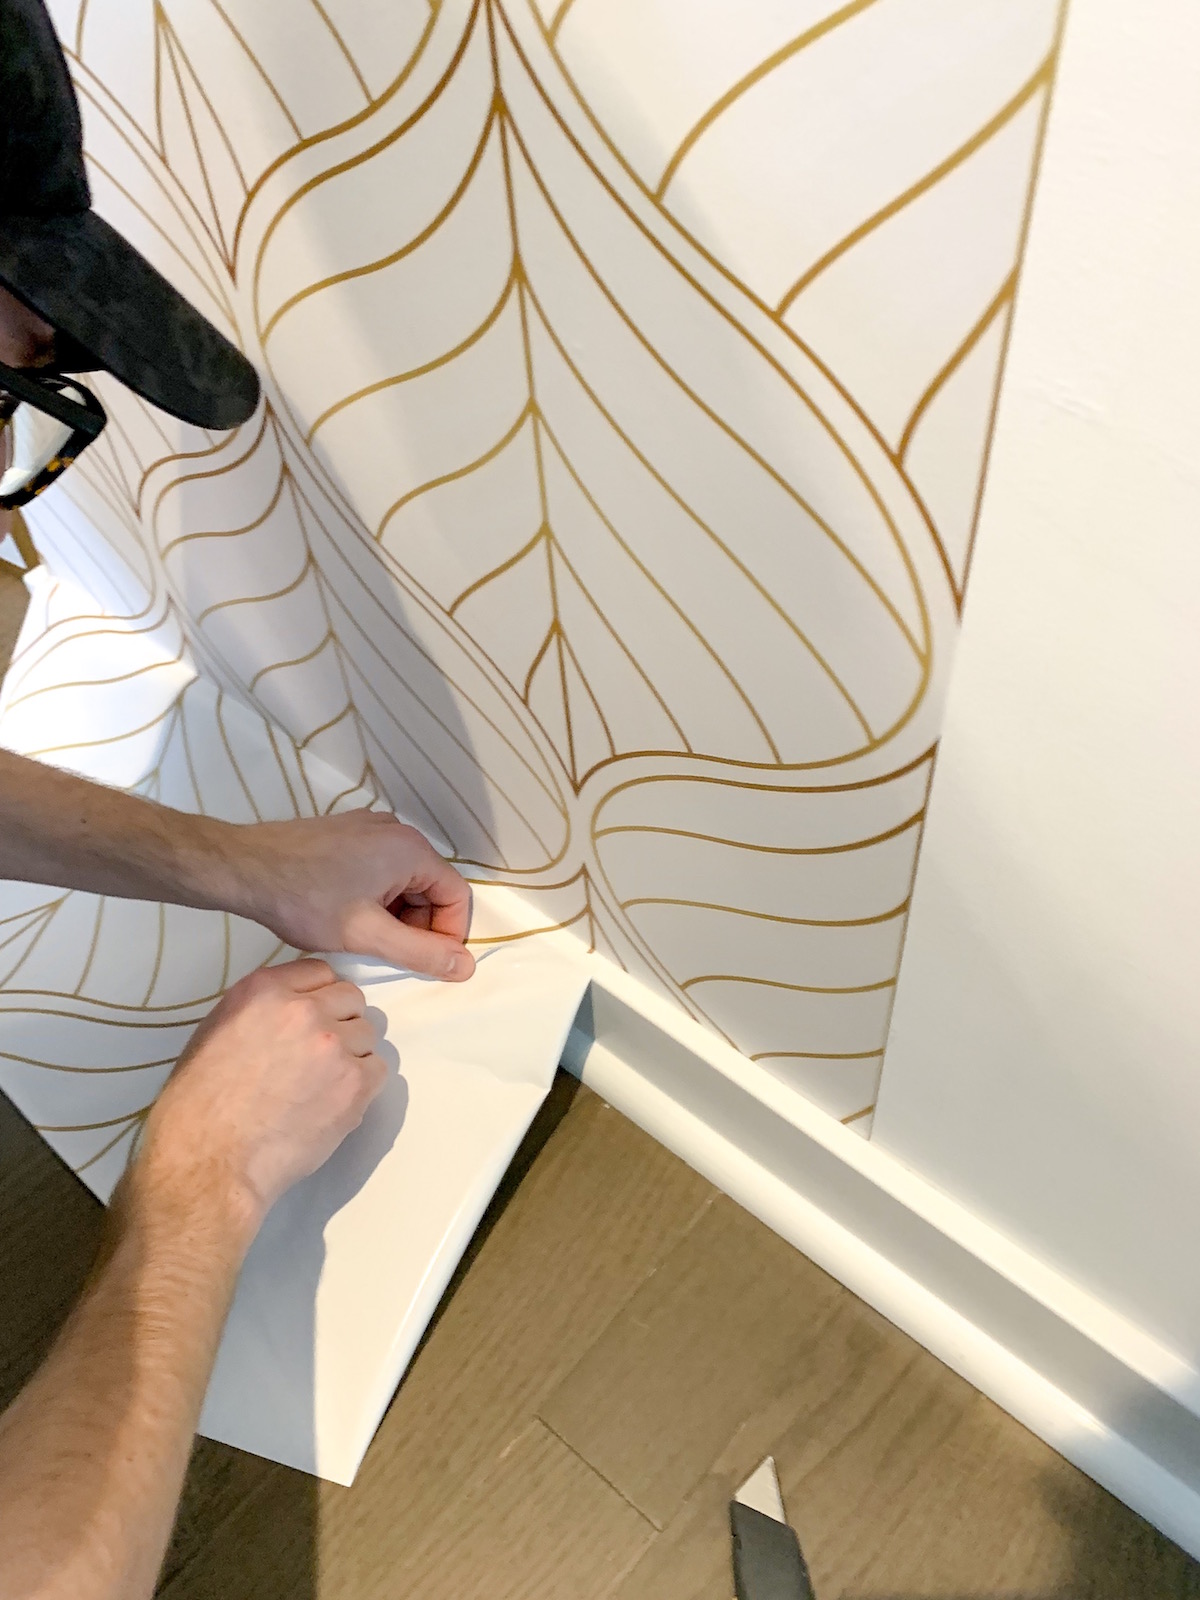
Once you reach the bottom of your wall you’ll likely have some excess paper. Take a sharp razor blade and cut off the extra length.
STEP 6
Repeat steps 3-6 until you’re finished!
Before following these exact steps, I would check to see if there are any specific instructions for the brand/type of wallpaper you purchase. There are so many sellers out there (especially on Etsy) and not all temporary wallpapers are printed on the same type of paper or use the same ink/adhesive. Depending on your wall paint there may be extra prep you need to do too. If you have questions I’d definitely check with customer service first– better to be safe than sorry!
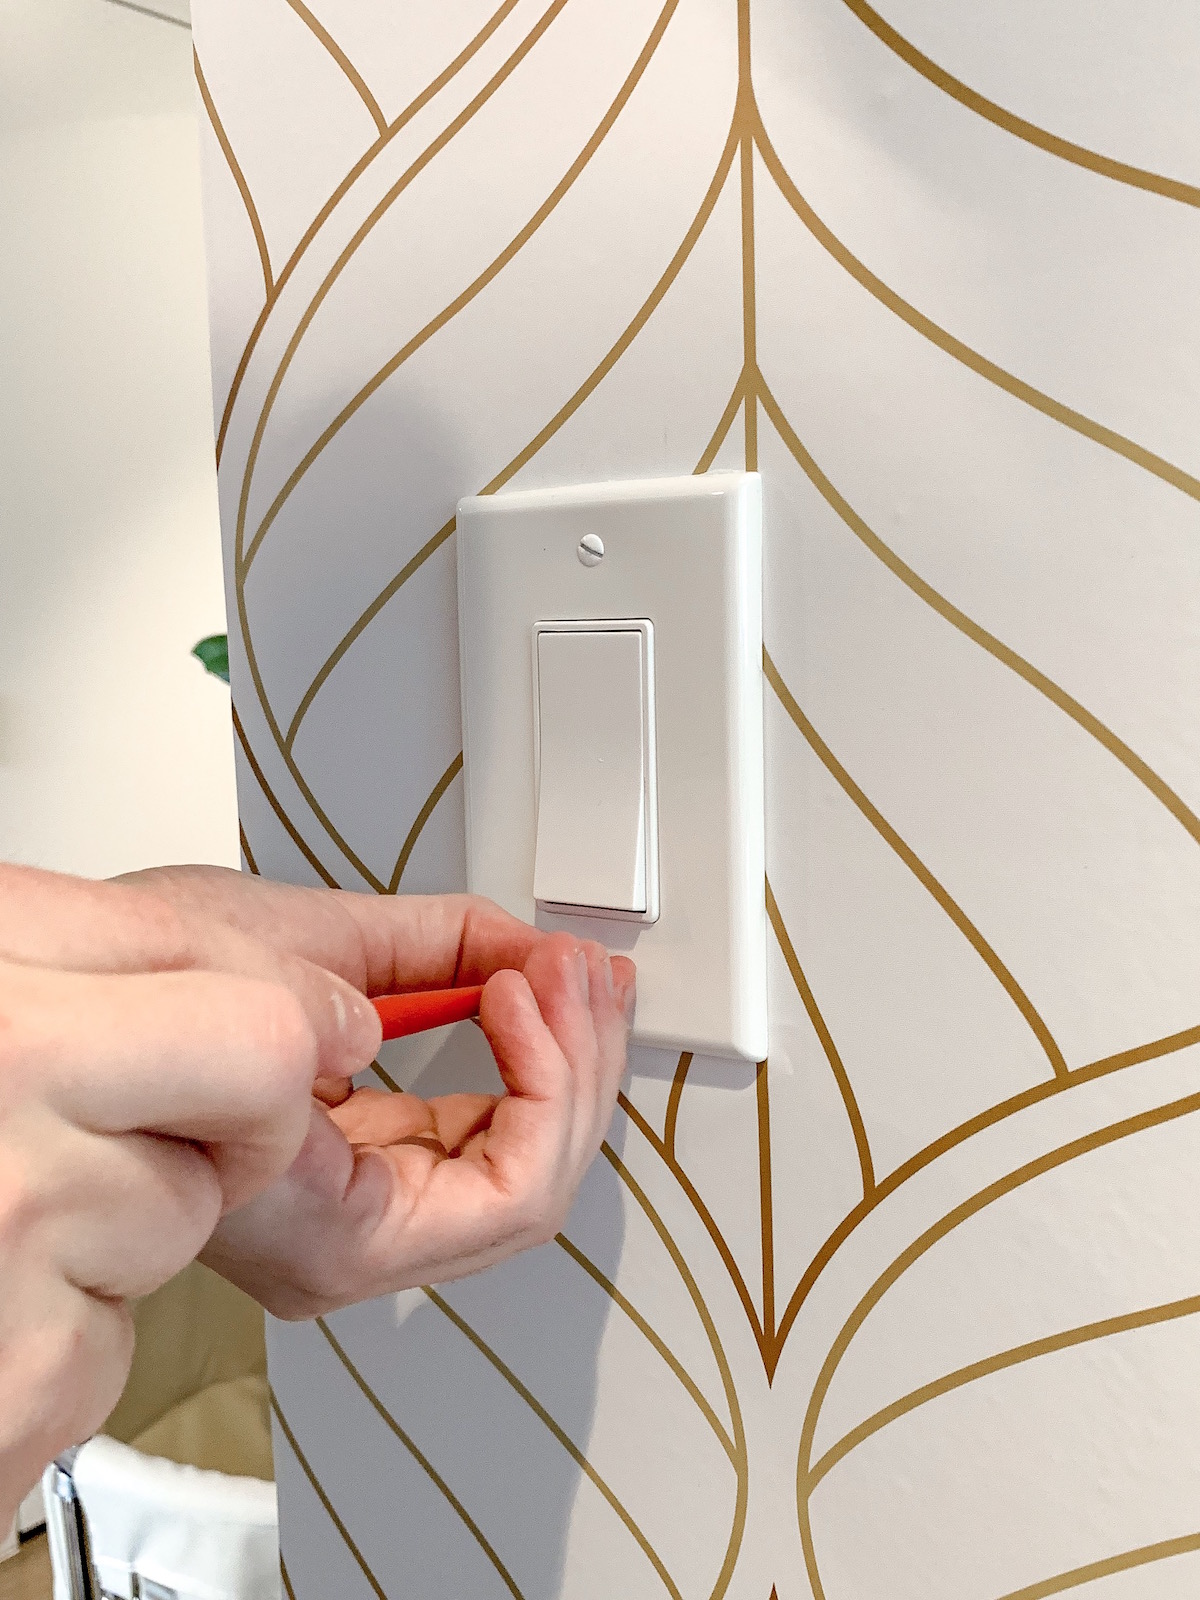
HOW TO APPLY WALLPAPER AROUND A LIGHT SWITCH
Apply wallpaper to a wall with a switch? Don’t freak out. It’s actually not that hard to do!
First make sure your electricity is turned off.
Next apply the wallpaper like normal, completely covering the light switch as if it wasn’t even there. Smooth out the edges and creases as best as you can around the switch plate.
Take a pencil and draw an X about 1/2 inch in from the outer edge of the switch plate, directly over the center.
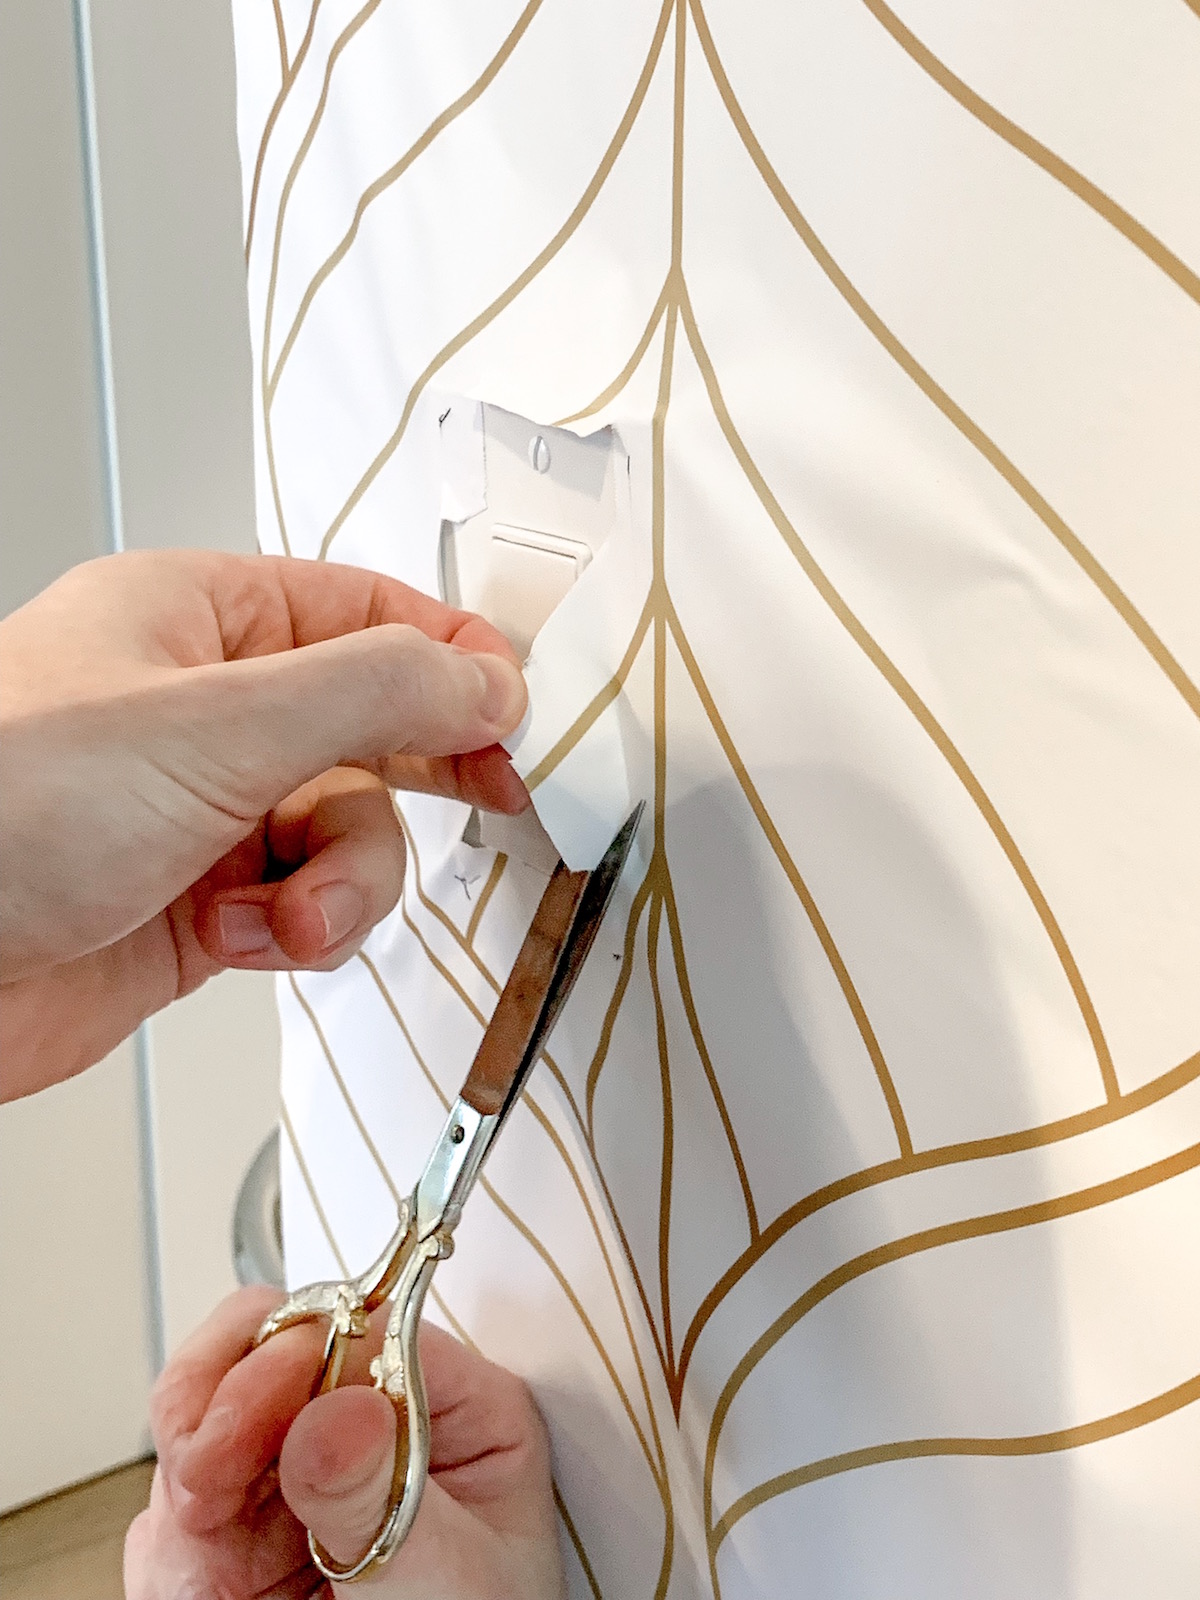
Using a razor blade cut through the X you just traced and remove the paper flaps. Just make sure you aren’t taking off too much– you still want there to be about 1/4-1/2 inches of paper overlapping on top of the switch plate.
Remove the switch plate with a screwdriver and re-attach it over top of the excess paper.
Turn your electricity back on and enjoy your beautiful wallpaper!
Annaliese says
Definitely pinning this post for my next apartment! I also love wallpaper but didn’t know it was possible to do in an apartment and have it look this GOOD! 🙂
xoxo A
http://www.southernbelleintraining.com
Gigi says
You and Nick did a perfect job. Amazing for your very first time. I to have always loved wallpaper and I’m considering doing my bathroom. Just have to get out there and select the one I want.
Jessica Camerata says
This came out beautiful! Your new apartment is looking so great!
xo Jessica
My Style Vita
Shannon R. says
I stumbled upon this article on Google and were pleasantly surprised how there are no pop ups or ads on your website. Thank you for your wonderful tips on peel able wallpaper and I will continue to browse the rest of your website. Bookmarked!
Every other blogger needs to take notice, don’t spam your visitors with ads after every paragraph and pop ups asking us if we want to subscribe to your spammy websites!